Tuesday, June 25, 2013

Winches and hose

Once again it's been a bit of time since an update.  A good bit of things have been completed, I just kept putting off updating the worklog.  To start with, I got rid of the busted grille and installed a new one.  It's aftermarket, but looks great!

You can see here how the old one was damaged.

Split just to the left of the headlight

The whole piece to the right of the headlight is gone and it's cracked underneath
This was simple enough, just pull the old one and pop the new one in.  Took maybe 10 minutes.  It didn't come with a new badge so I had to use the old one.


After replacing the grille I didn't do a lot with it for a few weeks.  Then I decided to finally get after installing that winch bumper.  You can see one of the brackets installed (on the driver's side) on the picture above.  The tow hook was stuck on the other side.  I tried cutting the bolt with a dremel but it was just taking too long.  A local body shop cut the bolt for me for free :)  After having the bolt cut off I got both brackets installed.


However, it seems that this bumper was made for a different front end than what my truck has.  The side pieces wouldn't fit and didn't even remotely line up.  I called up Louis (my buddy that helped with some other parts of this project last year) to ask his advice.  Being an engineer and familiar with a welder I figured he was the right guy to ask.  He was :)

I showed him what I had to work with and he looked it over for a while, then we took to the grinder.


For the side pieces, we had to cut the bumper mount off and remove a fair bit of material to get them to fit around the bumper properly.  Then the brackets themselves had to be split and bent a bit to get the proper angle.  We filled the split in with weld and grinded it smooth.  By the end of the day I was pretty dang good with a grinder and cut off wheel.


We had to weld a tab on the bottom of the side pieces to allow them to be supported enough.  As you can see the factory holes didn't line up (other than the first one) due to the bend and the adjustment we had to make in the mounting angle.


Some of the paint was damaged and there was a fair bit of freshly ground metal exposed so we primed and painted them.  The paint took 5-7 hours to dry according to the can, so we waited a few days until we were both free then got back to work.

Louis handled all the welding

We got it all test fitted and then made some custom mounts to attach it to the bumper support, since we had cut the ones that it came with off.  I bought some flat iron which we bent with a torch and sledge, then welded some supports on them, painted and installed.

You can see the bumper support just to the left of the lower driver's side flasher
I haven't bought a winch yet, but will do that later.  I also plan to mount a couple of extra off road lights to it to hopefully improve visibility when offroading at night (such as on camping trips).

I had noticed an odd noise coming from the passenger side wheel, so while working on some of this I pulled the wheel to check out the brakes.  One of the pads was defective and had broken apart.  This resulted in part of the pad cutting into the rotor and hub :(


The damage wasn't terrible but I wasn't pleased.  I got a free set of pads from Advance Auto, tightened all the bolts on the rotor, and it's been fine since.

I drove the truck for a few months on and off while doing things on my car or just for fun. It's a good little truck.  I began doing a projector retrofit on my car and due to a series of unfortunate circumstances it still sits in the garage in pieces waiting on some parts to arrive.  Last Thursday I was driving the truck to lunch and noticed it start running oddly and the steering being stiff.  I checked after I got to the restaurant and there was fluid everywhere in the engine bay.  I called my mom (she was off) and let her know I was having truck problems, so she met me there. I had her crank the engine and try turning the wheels, which resulted in a large spray of power steering fluid out of the high pressure line.

It doesn't show up well in the picture, but everything that has a pinkish/reddish tinge to it has PS fluid sprayed on it
Awesome.  There was an Auto Zone right accross the street, so I got some spare power steering fluid, hose clamps, and Gorilla tape.  I taped the hose up and secured it best I could with the clamps.  This didn't do much to stop the leak, but it kept it from spraying all over the wiring.  I cleaned up the wiring and everything I could as best as I could and limped it home.  While at the Auto Zone I ordered a new hose, which had to come from about an hour away and didn't arrive until after 730pm.  I went ahead and took the bolts out of the line and allowed the fluid to drain into a catch pan while waiting for this.

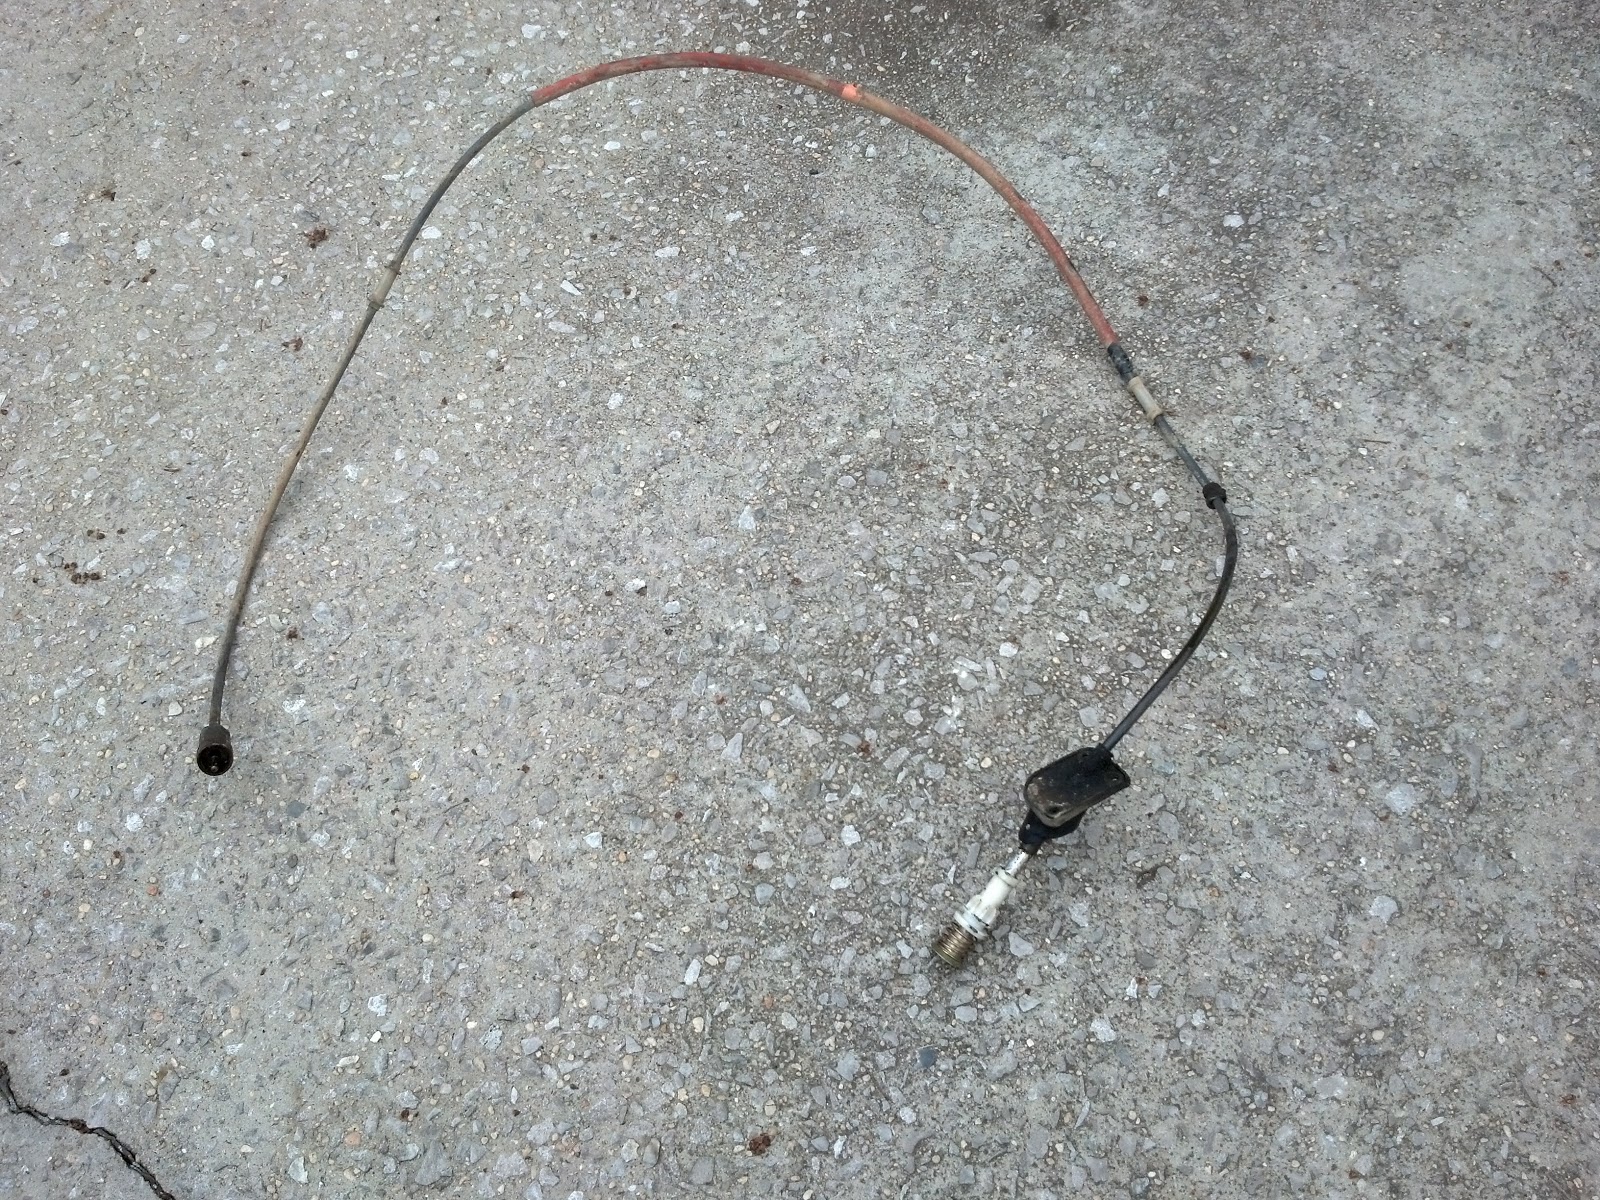
This is the line that burst, you can see moisture on the left side of it.
Replacing this hose turned out to be a rather inconvenient task.  Not exactly difficult, but quite bothersome.  While waiting on the hose to arrive, I went ahead and pulled the cruise control actuator deal out (I don't use cruise anyway and when I replaced my blinker stalk I lost the switches for it anyway).


This is something I'd been meaning to do for a while.  It was nice having that thing out of the way.

The hose finally arrived, but by the time I got back in town it was dark and I was tired.  Friday I drove my dad's truck to work since he is out of town.

Shiny new $62 hose :/
To replace this hose you have to disconnect both ends, remove 3 mounting brackets from the frame, and pull the radiator :(  I didn't really want to drain all my coolant out and whatnot, but rather than try to find a way to avoid pulling the radiator I just went ahead and did it.  I drained the coolant using the drain valve and caught the rest with a catch pan when I removed the lower hose.  I went ahead and replaced the lower radiator hose while doing this since it was a good time.

You can see the two power steering hard lines between the condenser and the fan

I thought about replacing the radiator, but it was surprisingly still in good shape.  The vents weren't clogged and it didn't have much damage.  I installed the new hose, reinstalled the radiator, filled them both with fluids, and then tested.  Surprisingly, no leaks!  I was pretty stoked about this, normally any time I fiddle with fluid lines I have to chase problems with leaks afterwards.  All of this sounds a lot easier than it was, getting those brackets off and all that jazz eventually took me all weekend, plus I was slowed by some family problems that came up.  I got the truck running Sunday evening around 7pm.  It was immediately thrown to the fire when I went to work Monday and had about 100 miles to drive.  Old girl made it just fine and is still leak free.  Steering works better than it ever has, so I suspect it may have been low on fluid for a while.

So that's how it sits now.  I still haven't been able to install my map lights or new lighted visors, but that will come eventually.  My primary concern right now is going to be getting my car driveable again...

Monday, April 1, 2013

Wire you so janky (see what I did there)

More progress on the truck!  Things have been going pretty smoothly lately.  The weather has been nicer and the days are getting longer, so more time for work :)

One of the things that had been bothering me was the way the defrost vents were sticking up.  2 of them would stick up on one end because the replacement dash cap I got was slightly warped.

Notice how the left and middle vents are raised along their right sides
This wasn't really something that effected function so I had lived with it, but with the truck nearing completion I wanted it cleaned up.  I popped the 2 vents out and used a hammer and a screwdriver to bend the metal under the vinyl of the dash around until I got it bent in a manner that allowed both of the vents to seat nicely.

Middle vent fixed
And the left...
Success!
Shortly after doing this the speedometer cable I ordered arrived.  I pulled the cluster out of the dash and got to work.


There were also a couple bulbs on the idiot lights that were out.  I went ahead and found replacements for these.   The lights aren't really important but I just like to have things working.


Here's the back of the cluster just so you can see this awesome 80s tech.


That greasy thing on the left side is where the speedometer cable connects to.  There was a little odd looking bit of plastic sticking out of this that I suspected was the end of the cable that had broken off.

I was right.
The cable wasn't too hard to get out surprisingly.  3 screws and a few clips, disconnect from the transmission and just yanked it out.

It was nasty and covered in grease
Got the new one out of the box.  Here's what the end is supposed to look like.


It was a lot more difficult to install this thing than it was to remove, but still it only took about 20 minutes.  There was a bunch of grease and other buildup around where it screws into the firewall, so I cleaned all that junk off.

Notice that open area under the brake booster vaccum line, that's where the cable mounts

Here's the new one installed, nice and clean

Tested it out and it works great!  It's a couple mph behind the GPS speedometer I was using, but close enough.  I'd rather it say I was going faster than I am than the other way around.

In another couple days I got the new plugs for the headlights to replace the janky wiring that I talked about a few posts ago.  I cut the little things off the ends of the wires on the passenger side, stripped away a few inches of wire that had been spliced into, and soldered the new plug in, then heatshrunk it and wrapped it in conduit.

Before:

After:


Tested it and it works great :)  Definitely looks a lot better than those stupid wires and I won't have to worry about them falling off/corroding/shorting/etc.

The other side was ok, but the plug did have some corrosion on it and the wires on that side had been spliced as well, so I cut that stuff out and replaced it as well.  That plug pack came with 2 anyway so why not.


The boot around the headlight on the driver's side is missing.  I tried to find one at advance and a couple other local places but they didn't have any.  I got on infamous nissan and my usual parts guy (david29) had some so I ordered one from him.  It'll be in in a few days.

Here's a picture with the old plug and one of those butt connectors that was used to splice some random piece of junk wire in.


I've still got some wiring cleanup I'd like to do in the engine bay, some niceties for the interior, that kindof thing but I'm really pleased with where the truck is right now :)  It's come a long way in just a little over a year!

Thursday, March 14, 2013

Interior is almost done...

Some more progress on the interior.  I finally decided to fix the environmental controls.  I got tired of ice being on the inside of the windshield and whatnot from always having the air circulating in the cab.  First thing I yanked the old one and all of its cables (the new enviro controls had cables with it, and they are attached much more securely.  Here's what the nasty old unit looked like.


As you can see, it was rather dirty and the cables were held in with those rusty metal clips.  The new one uses more like a plastic channel with some metal retaining pieces that are a whole lot better.  Unfortunately I neglected to take pictures of this.  Anyway, I got the new enviro controls in and cabled up, which is rather difficult when the dash is still in.  After this I noticed that I couldn't plug the AC controls in.  If you notice on that picture above, there's supposed to be a plug on that panel sticking out at the bottom.  This is what controls the fan speed.  The controls I bought were from a 95 truck, which uses a different wiring harness.  Luckily, I was able to retrofit the old selector switch and harness from my old controls over to the new one.


Here you can see where the selector and harness used to sit.  The 2 screw holes were what held it on, with a copper plate on the switch that slid along some strips of copper on the inside.  Just let me tell you though, that retrofitting that switch on there while the controls were still in the dash was quite an accomplishment.  It was extremely difficult as there is hardly any room to move, but I didn't want to risk damaging the unit by taking all those cables back out.  I tested it and it works great!  I still need to grease the moving parts of the thing that flips back and forth to go from circulating air to fresh air.  It's pretty difficult to move and I don't want it to break again...

After getting that done, I contacted david29 on infamous and got another jack cover panel (the last one I had ordered fell through).  This one is grey, but whatever, I was just tired of it being bare metal back there where my laptop bag gets caught on it.  I went ahead and bought the complete jack kit and whatnot from him as well, and some new defrost vents for the side of the dash.  While working back there, I went ahead and removed the rear seat belts.  They took up a lot of extra room, constantly flopped about, and also got hung on bags, jackets, and everything else I put in the back of the truck.


Passenger side, there's some storage space under this one but nothing in there


Driver's side, this is what all the spare tire tools are under
I also got some centercaps for the rear wheels, and some new lug nuts.  The lugs that the truck had were really worn (the finish is peeling off and rusting, plus they are really too small to use with these wheels) so I thought it best to replace them.  The centercaps are some cheap ones I found on ebay, but they fit and do the job.  If they start rusting quickly or something I'll probably just throw some paint over them.  I thought about doing the rear mud flaps while I was installing these but I was really tired that day and just decided to put it off until later.


I couldn't find a 6 lug set... so I have 5 black lugs and one silver, which is the wheel lock. I may paint it later,
I believe the coolant problem has been fixed.  The truck was low on coolant and must have been leaking from the old heater core.  I apparently just forgot to fill it back up after I changed the heater core out, so it had been nearly overheating when it sat idle for a while.  I added some coolant and bled the cooling system, so far after a tank of gas it seems to be fine :)

The next thing on the list is to install a proper plug on that passenger headlight that I worked on in the last update.  I ordered the part today, so it should be here shortly.  I'm planning to do some work to the wiring in the engine bay as much of it is worn or poorly connected.  I've got the valve cover gaskets sitting in a box (you can actually see it in that passenger side picture above) ready to install when I get some time.  I'm going to try to order the speedometer cable next week.  The truck is getting closer and closer to where I want it :)  I just updated the to do list with the current status.

Tuesday, February 5, 2013

Wheels and lights

Went for a while without doing much work on the truck, just driving it around and enjoying it being functional.  I did find a pretty good deal on some wheels (no tires) on craigslist.  I picked these up and just had a tire shop move the tires off the old wheels onto the new ones.  Both wheels are 15" the new ones are just wider, so the tires actually fit a lot better anyway.  I took these pictures shortly after having the wheels installed.

Era appropriate amirite


Dat offset
I was super pumped about these wheels. They look great on the truck and really make it look a lot better.  Plus the truck drives a lot better having tires that aren't all bulged,  hopefully this will help the tires wear more evenly also.  I had these for about 2 days before my mom ran into the truck :/ It didn't do any damage to mine, but jacked her bumper up pretty proper.  Dad decided to move the truck to a different spot in the yard, which for some reason made one of the rear tires go flat.  Not just flat like oh it has 15psi in it, flat as in there was a gap between the rubber and the wheel.  FFS.  Luckily I had kept all the old wheels, so I loaded one of those up in the Yaris the next day and had a different tire shop throw a used tire on it, balance, etc.  Took this home and installed it.  Drove the truck to the tire shop the next morning and had them fix the problem with the other wheel.  Turns out tire shop #1 used the wrong kind of wheel weights (the ones that clip around the rim) and it was causing an air leak.  I went ahead and had all the wheels rebalanced at tire shop 2 and they have been fine since then.  The truck didn't have a spare, so at least I have one of those now.  I mounted it under the truck properly and everything, so hopefully I'll be able to find a jack and toolkit that matches the truck soon.  I have a jack cover trim panel on order right now.

So, that wasn't really necessary but it really spruces the truck up.  Next I felt that I needed to knock at least something off the to do list.  I had ordered a new blinker/headlight control stick and that finally came in last week.  It doesn't have cruise control, but who even cares about cruise on a 5 speed anyway?  I replaced the switch and the interior lights work a crapton better, several of the idiot lights that didn't work before work now, and the best thing is that dim/bright work.  One of the previous owners had done something weird with the headlights and made this odd janky wire going across the front of the truck to the passenger side to power that headlight.  Dim didn't work at all so the lights were just on bright always, much to the chagrin of my fellow drivers.  After installing the new switch I began working through the wiring and eventually got everything sorted so that bright is bright and dim is dim.  For a while one light would be bright and the other dim because he had wired the passenger lights up wrong during his janky expedition to do whatever the crap he was trying to do.  After undoing all of his jank the lights worked just the same as they did before, so I really have no idea what he was trying to accomplish.

that blue wire is the one that goes to the driver side. There's supposed to be a plug here instead of just 3 wires stuck to the headlight.
dim
bright
So it's pretty awesome having that fixed.  The truck just feels better all the time.  I love that things are finally starting to come together for this little guy.

Monday, December 31, 2012

Problems continue, but I refuse to give up

As I mentioned in the audio post, the transmission on the Beast was nearing the end of its life.  A few weeks after that post I took it to the shop and had them check it out.  They said that the bearings and syncros had completely turned into powder and both the shafts were broken.  He was amazed the transmission still worked.  He said the damage inside was so extensive that he'd have to scrap that transmission, but had a source on a replacement.  I had them go ahead and do the swap.  It was expensive, but at least I have a running truck.  It was nice and quiet also compared to that constant droning noise the old one made.

Shortly after getting the transmission fixed, the noise from the driver's side front wheel was getting worse.  It seemed that every time I got up to around 30mph it would start making that whizzing noise and shudder when I slowed back down to around 20mph.  I figured this had to be the 4x4 hub since I'd replaced basically everything else on the truck.  To test my theory I removed the spring and brake for the 4x4 hub (this disabled the hub's ability to engage and effectively made the truck RWD).  Sure enough, the noise stopped.  I drove it like this for around 300 miles.  During this time the environmental controls broke -_-  Luckily I had a spare set of those sitting around I'd bought before for real cheap to have as a spare.  I haven't replaced this yet as it's pretty much always cold now so it's fine stuck where it is.  Temperature and fan speed still work, it's just stuck circulating air inside the cab and only moves between head/feet and feet/defrost rather than all the selections it should have.  The replacement panel is from a newer truck but should work fine.  I took the truck on a deer hunting trip in TN and did some off roading.  Even in RWD it did awesome.  I never got stuck and it crossed small creeks and very rough terrain with ease.  I drove it about 150 miles that day and didn't have any trouble at all :)

woohoo!
On my way to work one morning, the speedometer dropped to 0 and the odometer stopped counting.  From asking the guys on the forum, this is most likely the speedometer cable.  I haven't had a chance to look into this yet.

The truck sat for several weeks not being used because of holiday travel and a lot of long-range trips for work.  The Yaris gets such better mileage and is just easier to control at high speeds I drive it exclusively for lengthy trips.  It's also more comfortable.

I got a set of Warn Premium manual locking hubs for Xmas :)  My parents got them for me and I had to wait a little while to get some time to install them, but last night I put the truck in the garage and went at it.  The instructions are about as clear as the TN river, but with the help of a youtube video I got them installed correctly.  I haven't had a chance to test them yet, but they switch between lock and unlock with ease.  They seem to be quality pieces.  My only complaint is that the studs it comes with aren't grade 8.  I easily broke one of them off :/  I need to redo the passenger side hub anyway because I didn't do it right, it works but just isn't as clean as I like and needs to have that stud replaced.  I actually have some pictures of this haha.


Driver's side

Passenger side, note the broken stud


All the greasy parts removed from the automatic hubs were placed in bags with the respective hub and put into the Warn box.  I'm not sure if I want to keep these or sell them.  They could be rebuilt if someone had the parts, I was just unable to find them.  I'm going to update the to-do list with the new problems, but hopefully they will be pretty easy to fix.  It seems like every time I get something working something else breaks.