Monday, March 17, 2014

Not done, but here's an update anyway.

So the engine work isn't over yet, but I've got a lot of pictures and stuff and figured I'd throw an update out here since its been a while.  This project has been a mess.  Sourcing parts, returning bad parts, buying hoses 400 times, etc.  It's been a constant battle.

So I cleaned the block with a few razor blades.  It took forever but worked pretty well.  It wasn't hard to tell where the gaskets were busted.  Some rust had accumulated but scraped/cleaned off pretty easily.  I ordered a set of heads from Cylinder Heads International (www.headsonly.com).  While waiting on the heads, I went ahead and installed 2 new motor mounts from Rugged Rocks.  They're pretty awesome and weren't too bad to install.


The heads showed up and seemed great.  One of them worked just fine. I popped the exhaust studs in it and bolted the manifold on, then set it on the block.  The other one though, had obviously had some thread work done on the exhaust manifold side and whoever did it failed miserably.  1 of the stud holes was canted pretty severely and another was just completely in the wrong place.  I had to send that one back and get another.  The next one I got didn't have the valve cover gasket surface prepped and had a jacked up stud stuck in the exhaust manifold side -_-


Notice the stud stuck in the side
I was ill about this but didn't want to risk returning it for a refund because they said they'd give me a random core in return.  I got together with a buddy and we got that stud out without a whole lot of effort.  Got that head on, got some new head bolts and washers, and bolted those bad boys down.

I had been meaning to remove the clutch damper and replace the clutch master and slave cylinders, so one day while I was stuck waiting on some parts to show up I tackled that.  The clutch master cylinder looked awesome.  The fluid was semi-solid.  I have no idea how the clutch worked at all.

Clutch hydraulic fluid is not supposed to be green/black.
I drained the nasty fluid out of the lines and also removed the clutch damper, replacing it with a 10mm metric union.

Clutch damper = thing designed to make your clutch horrible
Doing all this wasn't too bad.  Even the slave cylinder wasn't horrible to replace.  The old one was leaking everywhere, another pretty solid indication that my clutch was working at about 30% of what it should have been.

Prior to me cleaning this area (some) there was hydraulic fluid everywhere
And here's what the new master cylinder looks like.

Complete with nice new clear hydraulic fluid.
The next thing that needed addressing was my radiator core support.  It was in horrible shape and was just always in the way anyway, so I figured I'd yank that while waiting on parts.  It would make reassembly easier anyway.

Note the huge rust hole in the bottom of the driver's side portion
about 2/3 of the core support removed via sawzall and a lot of drilling.
The core support is welded in, so it was pretty aggrivating to get removed.  I ended up stretching that out across a few workdays.  The core support is completely gone now.  There's a nice shiny new painted one sitting in the bed waiting to be reinstalled once the engine work is done.

Once the heads were bolted down and I had everything torqued properly, I wanted to address some bits of the intake manifold that weren't needed.  The EGR didn't work anyway because someone had made some small degree of effort to block it off in about the most stupid way possible.  I removed the EGR completely and blocked it off with an aluminum plate a friend made for me.  I plugged up another hole that went to some sort of little dilly that had a couple of hoses attached to it, but that weren't actually attached to anything.  It was basically the vacuum leak port, I have no idea what it was for.  I figured if the truck ran with it leaking everywhere I'd just plug it with JB Weld, so that's what I did.


So this is pretty much how the truck sits now.  I have a few other minor things put on, but I'm going to hopefully get more work done this week.  I hope to have the timing all sorted and get the engine back together completely in less than 2 weeks.  Hopefully she'll crank for the first time since September this month :)

Sunday, January 5, 2014

Yay cosmetic things! Aww.... Engine failure :|

So last time we left off where I had just finished getting the bed rail installed.  Shortly after the last post I got that finished up, then my grandad took a turn for the worst and passed away.  Here on out, I'm dedicating the truck to him.  I was hoping to get the bed rail painted and whatnot before he passed on (I knew he wouldn't like it in pink) but that didn't happen.  Anyway, between that happening and then me moving, progress got delayed for a bit.  I digress.  I got the sanding done (I didn't sand it down all the way to the metal for the most part, just knocking the surface paint off and roughing it up to allow my primer/paint to adhere better, also to get rid of any rusty spots where the paint had chipped.  Painting the rail in the truck wasn't real fun, but it wasn't terrible either.


Taping bits of magazine and those big black garbage bags all over the truck helped me keep the black paint off the rest of the truck.  After I got the whole thing painted, I got some lights off Amazon.  These are "Tuff LED Light" brand rated at around 1200 lumens.  I wanted two facing forward and 2 facing rearward (to use as reversing lights).  The bed rail already had holes for installing lights, so I yanked all the old wiring the previous owner of the rail left in it and bought some shiny new wiring, again from Amazon.  Amazon is the best place I've found for wiring, switches, etc. just FYI.  I ran the wiring through the bed rail, then through a hole in the bed, along the frame and up to the cab.  There just happened to be an unused grommet under the seat :)  I cut a hole in this and ran the wires (in loom) up through this and through the same channels the rest of the wiring under there used.  It worked out well.


Here you can see the grommet with the wire loom exiting
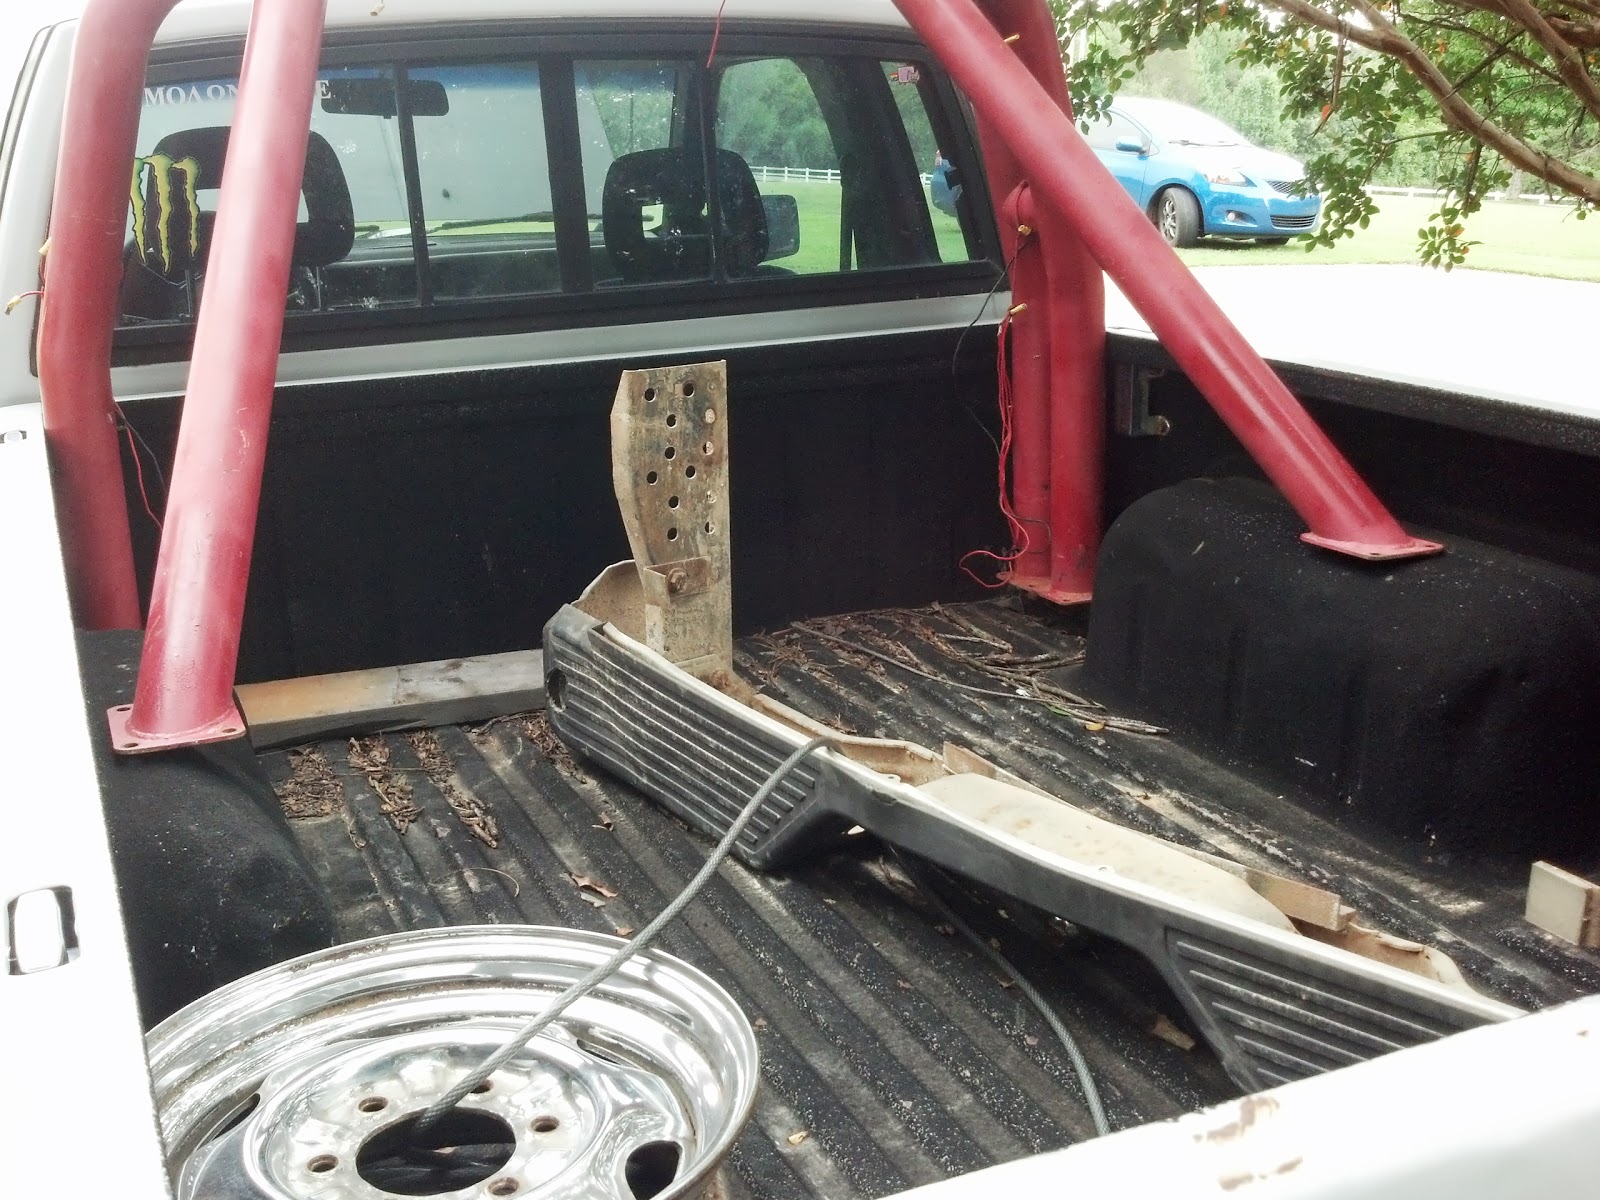
Wire loom going out of the bed rail and through the bed
The switch beside the power mirror adjustment knob is for the forward facing lights, and the one below the dash dimmer is for the rear facing lights.  I originally wanted them side by side and still would have preferred that, but there just wasn't enough room.


So I finished this a few days after grandaddy's passing and took the truck out for a spin.  I was pretty excited about the lights being on there and was anxious to try them out.  I drove it around a bit and then when night came I headed out to test the lights out.  Man, were they awesome.  I was super impressed with the dispersion and how far the light was cast.  Then I noticed my temperature gauge.  This was late September, so it was still hot during the day, but at night it was nice and cool.  Well, my truck was sitting at the red line.  I knew one of the head gaskets had been gone for a while (I could smell coolant in the exhaust and had to refill the coolant regularly) but it wasn't too bad, as long as it wasn't real hot and I didn't have to stay stopped a long time it was fine.  Well, now apparently both of them had gone and it didn't take long at all for it to get hot.  I drove it around a bit the next day and it got very hot rapidly.  I shut the truck down and parked it for a fair while.
Sometime I also installed this oil filter relocation kit, but I don't remember when, lol.
Months pass...

My car started acting up one day and a whole bunch of other junk.  It was a stressful time with money being short and Christmas coming up.  I was behind on some credit card debt and some other stuff anyway and it was just a bad time.  I was stressed and didn't know what to do.  Borrowing vehicles, paying for rentals, hemorrhaging money like a stab to the jugular.  I decided I'd just reach into savings and pay a shop to rebuild the Beast's engine for me.  I had gathered all the parts over the last few months, but I'd never done this in depth of work on the engine before and was pretty nervous, plus nobody has time for that.  I called a shop and they were like sure bro bring it over here and we'll fix it.  They kept it for a few days, then were like "LOL J/K too many rust" and gave it back to me.  :|  Frustration to the max, yo.  Feels were raging faster than the Ocoee river and I felt like setting the world on fire.  I decided to get after the car again see if I could figure out what was going on.  Previous attempts had failed.  It was misfiring, barely running, throwing a million codes, etc.  I cranked it up that day, and it was like "lol bro I was just joking" and has been working ever since.  I'm glad it's working, but I really wish I knew what the crap happened.

I digress.

Since the shop are a bunch of punks with minuscule testicles, I got after the truck on my own.  Started yankin stuff off this old guy like it weren't no thang.  My buddy that's helped on some other bits of the truck helped here and there, but for the most part I've done a good job of making progress on my own.

That intake manifold was stupid difficult to remove.

Remove things so I can remove things so I can remove things so I can remove things so I can remove things.
Got that nasty leaky piece of trash of a water pump out of there.  It was the 26 year old original water pump.

Heads off
Heard you like gaskets
 Apparently whoever sortof almost tried to fix some things on this engine before was a complete douchetard.  He didn't bother cleaning the gasket surface before when the pump was leaking, just used silicon and a new gasket over the top of the old one.  What a champ.  I got a surface prep kit and an angle air grinder thing and went to town, finally got all that stuff off.  It took forever.  While doing that I got a bunch of degreaser and whatnot and cleaned the front of the engine as best I could.


So flipping shiny amirite?

 You can see in the picture above that there was still a lot of nasty head gasket residue left over.  This, luckily, wasn't as bad as the water pump gasket, so I was able to remove it using the razor blade method that seemed to be favored around automotive forums.  The gasket residue came off easy enough, but the exhaust manifolds were being stubborn.  I had new ones because the whole exhaust system is one large mass of rust, but these have rusted together so hard none of the bolts will move at all.  I'm going to have to just cut the exhaust free, then take it to a shop and get them to build me a new exhaust.  I've got the new heads sitting in the garage and hopefully will have a couple of little gaskets I was missing in in a few days.  Once those arrive and I get the exhaust out, I can start putting stuff back together.  I found so many problems with this truck along the way.... one of the intake pipes had a shotgun bore cleaner brush stuck in it, for crying out loud.  A ton more hoses were cracked, rotten, leaking, or just missing completely.  It's a wonder this thing ever moved.

After I'm done with it, I really hope it runs like a champ, and runs for another 250k+ miles.

In memory of J.M. Burns January 1937 - September 2013

Sunday, September 8, 2013

Fixing things, adding things. Things things things.

Due to some family stuff and having a fair bit of overtime at work I've been a bit lazy and haven't updated the build log in a while.  Progress on the truck continues, however.

A fairly quick and cheap task I wanted to get out of the way was fixing the janky crap of a positive battery terminal that the truck had on it.  There was also a wire that had been spliced together by hand and didn't even have tape over it, so I figured I'd tidy up some of that.  The old terminal was really soft and the way the previous owner had wired some other stuff to it was pretty gnarly.

Plenty of corrosion damage, you can tell it didn't have much life left

That nasty splice


I replaced the terminal with a nice new brass one.  Cleaned up the end of the positive wire and re-terminated the ends of the 2 additional wires with some properly sized terminals.  Cut the ends off and soldered that nasty wire and heatshrinked it.  I then wrapped the whole thing in some nice new wire conduit (not pictured).

So that was a simple enough task.  Whole thing took less than an hour.  The next thing that had been bothering me was a piece of metal interior trim that goes below the rear window.  It was rusty and I had removed it and had it lying in my garage for around a year.  I finally sanded and cleaned it, then sprayed it with Rustoleum rust converter primer.


After priming it I shot it with 4 coats of Krylon Oxford Blue.  It doesn't match perfectly but it looks pretty good.


Realised I didn't have a picture of it in the truck, so I just ran out and took one.
One day while browsing Craigslist I happened to see a trailer hitch receiver for a early model Frontier.  I sent the owner a message asking about it. He said it would work on the hardbody as well.  I did some googling and found this was the case.  I decided since I'd have to pull the bumper off anyway that it was time to get rid of that jacked up rear bumper.  I ordered a early model Frontier chrome bumper and brackets off eBay.  The bumper arrived after a few days, but I was going offroading with some friends so I decided to wait until after that to install it.


After I got back I yanked the rear bumper.  Upon doing this I realized there was some minor frame damage on the passenger side.  The bumper bracket on that side looked like it had been stretched.  It was warped and the bolts were so badly damaged that I had to just use a breaker bar and break the heads off, then tap them out with a hammer.  That bend in the frame was preventing the hitch receiver from lining up properly.  I took a couple pieces of flat steel I had and used my ball joint press to straighten most of it out, then tweaked on it by clamping an adjustable wrench on it and bending it around with that.  It turned out to be pretty easy.

There's what it looked like before. The receiver uses that bottom hole, so that had to be fixed.
With that fixed, I installed the rear bumper.  It did require some modification to get 3 bolts in.  The bumper said it only needed 2, so only 2 of the holes lined up.  The 3rd hole (the receiver hitch recommends using 3) lined up about 70% of the way, so I just used a dremel to open the hole up some more on the frame.

The new bumper looks significantly better.
If you watched the video above, you'll have heard me talking about water getting in the motor.  I took a little bit in through the intake (luckily no damage done).  The cause of this was mostly this huge rust hole.


I'm pretty sure I had mentioned fixing this before but just had been putting it off.  It was finally time to do something about it, so I went and bought some sheet aluminum.  I cleaned the rust hole up some and then sprayed it with rust converter primer.  Waited a day then sprayed a 2nd coat.  Waited another day and then sprayed the area with silver hi temp paint.


I know this isn't the best fix, but it's good enough for now.  If it keeps getting worse I'll tear the snout of the truck off and do a proper rebuild.  Anyway, after painting it I used some paper and made a template of the hole, then used that to cut some of the sheet aluminum to shape. I put a nice thick bead of liquid nails around the opening, then drilled and riveted it in place.  The liquid nails should do a good job of sealing it.  I used liquid nails under the bottom to try to fill in areas I thought moisture might accumulate.

First piece of aluminum riveted in place

both piece in place. It looks pretty good IMO.
After getting the aluminum in place I let the liquid nails dry for a day, then primed it and sprayed the area again with the silver high temp paint.  The next day I put all the stuff that goes in that area back in. 

Once it gets dirty it'll hardly be noticeable :)
I don't remember if I've mentioned it here, but ever since I purchased the truck I've been looking for one of those light bars that goes in the bed.  Well, I finally found one.  It was actually made for a Toyota so I figured it would require some work, but thought I'd check it out.  It barely fit in there.  We literally had to shove it in place.  Once it was in there, it wasn't coming back out.  Oh well.  Paid the guy and drove home.

Original janky bumper is still lying in the bed today, lol.

As you can tell, it was night so I didn't get to work on it any on day 1.  I'm sure you can tell the paint job is pretty crap.  Also, it's pink.  I would have preferred to be able to paint it outside the truck, but whatever.  I can deal.  I'm not sure if you can tell from the photo, but it's leaning forward because the Toyota's wheel wells are shorter.  I leveled it out s that I could bolt it up on the wheel wells and then measured the gap.  It was so tight fitting in there it would just sit like that, with the front bars just hovering in space even without the bolts in the rear.


I was planning on buying some steel tube to use as a 2" spacer.  A buddy suggested just using pieces of pipe cut to length.  That seemed easier so I went with his suggestion.  Drilled some holes and put the pipe in, then bolted it down.


I've currently got about 30% of the rail sanded and primed.  I'll post pictures of it fully painted in the next update.  I've got a ton of parts ready to do some major engine work.  I'm not sure when I'll get around to doing that part, but hopefully it'll be pretty soon.

Tuesday, June 25, 2013

Winches and hose

Once again it's been a bit of time since an update.  A good bit of things have been completed, I just kept putting off updating the worklog.  To start with, I got rid of the busted grille and installed a new one.  It's aftermarket, but looks great!

You can see here how the old one was damaged.

Split just to the left of the headlight

The whole piece to the right of the headlight is gone and it's cracked underneath
This was simple enough, just pull the old one and pop the new one in.  Took maybe 10 minutes.  It didn't come with a new badge so I had to use the old one.


After replacing the grille I didn't do a lot with it for a few weeks.  Then I decided to finally get after installing that winch bumper.  You can see one of the brackets installed (on the driver's side) on the picture above.  The tow hook was stuck on the other side.  I tried cutting the bolt with a dremel but it was just taking too long.  A local body shop cut the bolt for me for free :)  After having the bolt cut off I got both brackets installed.


However, it seems that this bumper was made for a different front end than what my truck has.  The side pieces wouldn't fit and didn't even remotely line up.  I called up Louis (my buddy that helped with some other parts of this project last year) to ask his advice.  Being an engineer and familiar with a welder I figured he was the right guy to ask.  He was :)

I showed him what I had to work with and he looked it over for a while, then we took to the grinder.


For the side pieces, we had to cut the bumper mount off and remove a fair bit of material to get them to fit around the bumper properly.  Then the brackets themselves had to be split and bent a bit to get the proper angle.  We filled the split in with weld and grinded it smooth.  By the end of the day I was pretty dang good with a grinder and cut off wheel.


We had to weld a tab on the bottom of the side pieces to allow them to be supported enough.  As you can see the factory holes didn't line up (other than the first one) due to the bend and the adjustment we had to make in the mounting angle.


Some of the paint was damaged and there was a fair bit of freshly ground metal exposed so we primed and painted them.  The paint took 5-7 hours to dry according to the can, so we waited a few days until we were both free then got back to work.

Louis handled all the welding

We got it all test fitted and then made some custom mounts to attach it to the bumper support, since we had cut the ones that it came with off.  I bought some flat iron which we bent with a torch and sledge, then welded some supports on them, painted and installed.

You can see the bumper support just to the left of the lower driver's side flasher
I haven't bought a winch yet, but will do that later.  I also plan to mount a couple of extra off road lights to it to hopefully improve visibility when offroading at night (such as on camping trips).

I had noticed an odd noise coming from the passenger side wheel, so while working on some of this I pulled the wheel to check out the brakes.  One of the pads was defective and had broken apart.  This resulted in part of the pad cutting into the rotor and hub :(


The damage wasn't terrible but I wasn't pleased.  I got a free set of pads from Advance Auto, tightened all the bolts on the rotor, and it's been fine since.

I drove the truck for a few months on and off while doing things on my car or just for fun. It's a good little truck.  I began doing a projector retrofit on my car and due to a series of unfortunate circumstances it still sits in the garage in pieces waiting on some parts to arrive.  Last Thursday I was driving the truck to lunch and noticed it start running oddly and the steering being stiff.  I checked after I got to the restaurant and there was fluid everywhere in the engine bay.  I called my mom (she was off) and let her know I was having truck problems, so she met me there. I had her crank the engine and try turning the wheels, which resulted in a large spray of power steering fluid out of the high pressure line.

It doesn't show up well in the picture, but everything that has a pinkish/reddish tinge to it has PS fluid sprayed on it
Awesome.  There was an Auto Zone right accross the street, so I got some spare power steering fluid, hose clamps, and Gorilla tape.  I taped the hose up and secured it best I could with the clamps.  This didn't do much to stop the leak, but it kept it from spraying all over the wiring.  I cleaned up the wiring and everything I could as best as I could and limped it home.  While at the Auto Zone I ordered a new hose, which had to come from about an hour away and didn't arrive until after 730pm.  I went ahead and took the bolts out of the line and allowed the fluid to drain into a catch pan while waiting for this.

This is the line that burst, you can see moisture on the left side of it.
Replacing this hose turned out to be a rather inconvenient task.  Not exactly difficult, but quite bothersome.  While waiting on the hose to arrive, I went ahead and pulled the cruise control actuator deal out (I don't use cruise anyway and when I replaced my blinker stalk I lost the switches for it anyway).


This is something I'd been meaning to do for a while.  It was nice having that thing out of the way.

The hose finally arrived, but by the time I got back in town it was dark and I was tired.  Friday I drove my dad's truck to work since he is out of town.

Shiny new $62 hose :/
To replace this hose you have to disconnect both ends, remove 3 mounting brackets from the frame, and pull the radiator :(  I didn't really want to drain all my coolant out and whatnot, but rather than try to find a way to avoid pulling the radiator I just went ahead and did it.  I drained the coolant using the drain valve and caught the rest with a catch pan when I removed the lower hose.  I went ahead and replaced the lower radiator hose while doing this since it was a good time.

You can see the two power steering hard lines between the condenser and the fan

I thought about replacing the radiator, but it was surprisingly still in good shape.  The vents weren't clogged and it didn't have much damage.  I installed the new hose, reinstalled the radiator, filled them both with fluids, and then tested.  Surprisingly, no leaks!  I was pretty stoked about this, normally any time I fiddle with fluid lines I have to chase problems with leaks afterwards.  All of this sounds a lot easier than it was, getting those brackets off and all that jazz eventually took me all weekend, plus I was slowed by some family problems that came up.  I got the truck running Sunday evening around 7pm.  It was immediately thrown to the fire when I went to work Monday and had about 100 miles to drive.  Old girl made it just fine and is still leak free.  Steering works better than it ever has, so I suspect it may have been low on fluid for a while.

So that's how it sits now.  I still haven't been able to install my map lights or new lighted visors, but that will come eventually.  My primary concern right now is going to be getting my car driveable again...